

How to Bleed a Volvo Penta CAD 43 Engine Fuel System
Bleeding the fuel system on your Volvo Penta CAD 43 engine is a crucial maintenance task to ensure smooth engine operation. Air in the system can disrupt fuel flow, but with a few tools and the right technique, you can easily purge the system of air. In this guide, Jonathan Parker from Park and Sports Sales shares his expertise on how to get the job done.
Tools Needed:
- A 10mm spanner
- A clean cloth or rag
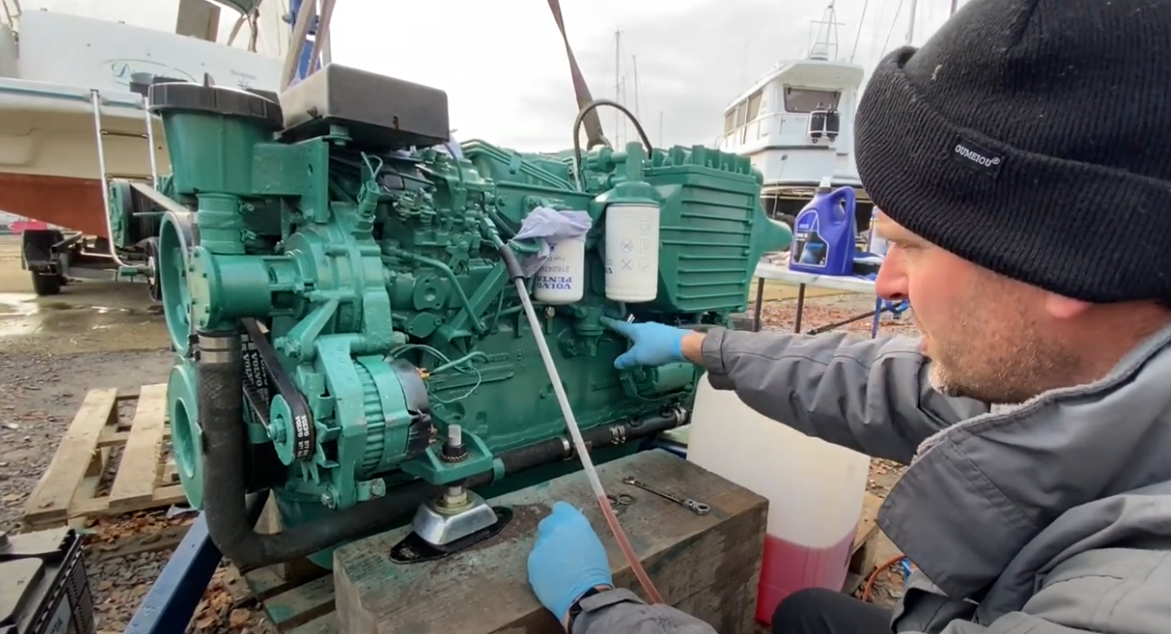
Step 1: Understand the Fuel System Components
Jonathan begins by explaining the layout of the fuel system. Familiarize yourself with these key components:
- Fuel Lift Pump: This pump is powered by the engine camshaft when the engine is running.
- Fuel Feed Line: This line brings fuel from the tank to the lift pump.
- Fuel Filter: Positioned between the lift pump and the high-pressure fuel pump.
- Bleed Screw: Found on top of the fuel filter, it allows air to escape from the system.
Since air naturally rises above fuel, the bleed screw is located at the system’s highest point to help purge trapped air.
Step 2: Locate and Loosen the Bleed Screw
Locate the bleed screw on top of the fuel filter. Loosen it slightly. As Jonathan explains, bleed screws typically have a groove or a small hole to allow air and fuel to pass through. Be cautious not to lose the washer when handling the screw.
Step 3: Prime the Fuel System
To manually pump fuel, use the lever on the side of the lift pump. Jonathan highlights that only the last part of the lever's motion effectively pumps fuel, so focus on applying pressure at that point.
Step 4: Pump Until Fuel Appears
Pump the lever to start drawing fuel into the system. If the fuel filter was recently replaced, it will need time to fill. Pay attention for the sound of escaping air and watch for bubbles at the bleed screw. Continue pumping until a steady stream of fuel emerges.
Step 5: Tighten the Bleed Screw
Once you see a consistent flow of fuel:
- Tighten the bleed screw with your fingers.
- Secure it with a 10mm spanner, as Jonathan advises, being careful not to over-tighten. The screw is made of soft metal and could be damaged if overtightened.
Step 6: Check for Leaks
Jonathan emphasizes the importance of wiping the area around the bleed screw with a clean cloth to ensure it’s dry. Pump the lever firmly and inspect for leaks. If no fuel leaks are observed, the system is successfully bled.
Final Steps: Inspect and Test
Finally, double-check that all components are properly secured. Pump the lever one last time to confirm that no air remains in the system.
Special Thanks to Jonathan Parker
This guide is based on a detailed walkthrough by Jonathan Parker of Park and Sports Sales. His clear explanations and expert tips make it easy to tackle this essential maintenance task with confidence.
By following these steps, you’ll keep your Volvo Penta CAD 43 engine in peak condition. Thanks for reading, and happy boating!
Bottom of Form